Create a push notification profile
A push notification profile is a way to let Dotdigital know how to communicate with your app through Apple's APNS and Google's FCM push systems, as well as how to authorise a user for push.
You can have only one profile, which can be set up to send push notifications to both Android and iOS devices.
To set up your push notification profile:
-
Log into Dotdigital.
-
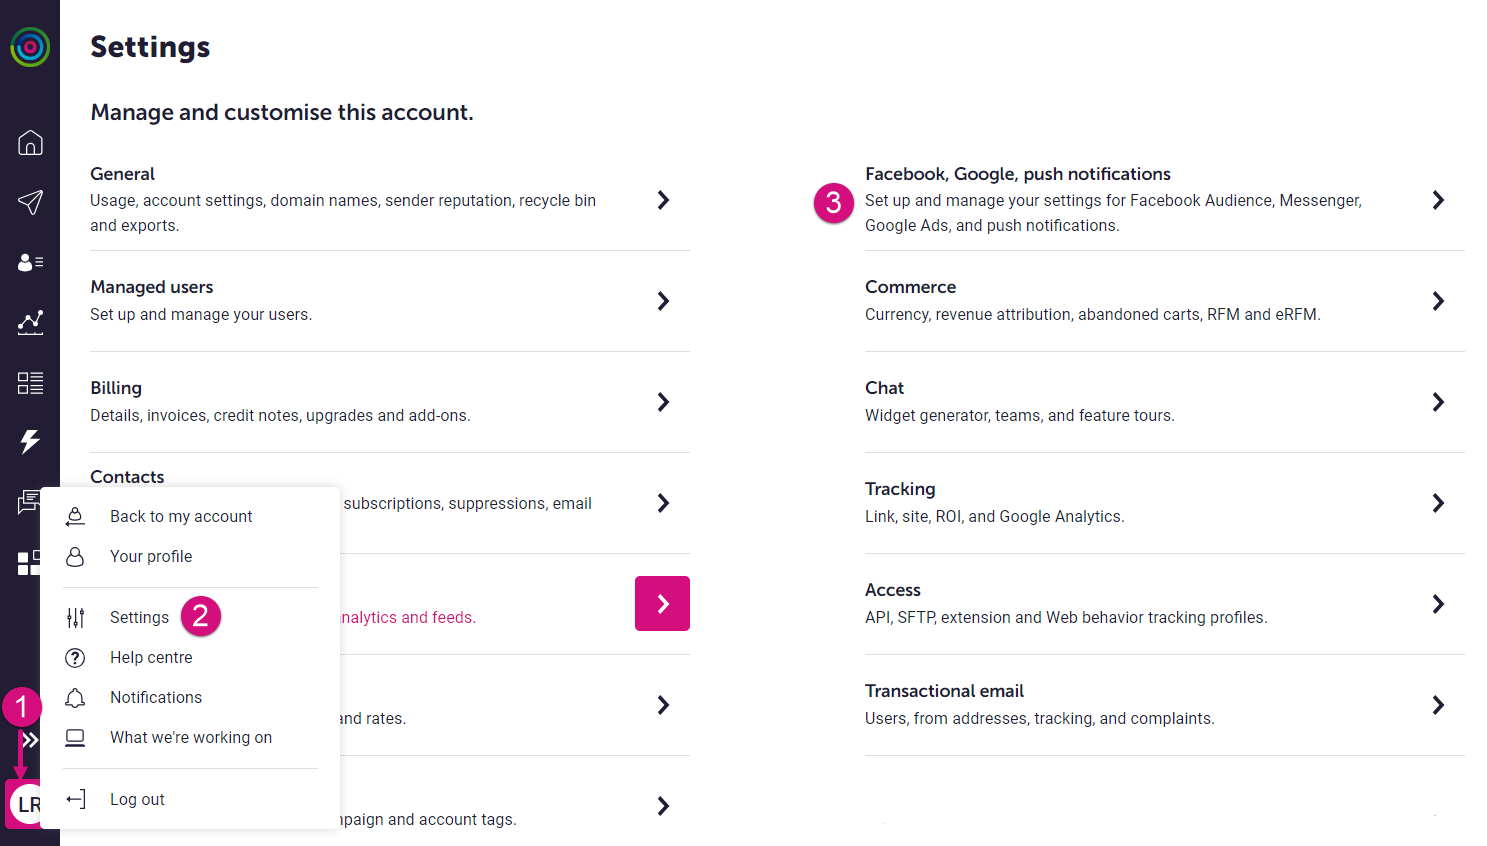
Expand the User menu in the bottom left and go to Settings > Facebook, Google, push notifications.
-
Under Channel, select Push notification, then select NEW PROFILE.
-
Select the text box under Edit profile and enter the name of your app.

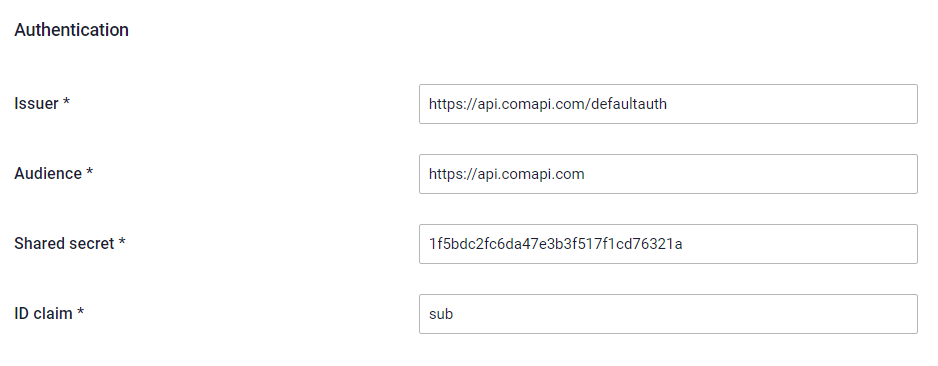
- In the Authentication section, the values are pre-populated for you. Make a note of the values for each field. You use these values to create a JSON Web Token (JWT) in your app and pass that token to our SDK to authorise the user for push.
Ensure your JWT details are correct
The issued and signed JWT your app passes to identify an app user to Dotdigital must have:
- An
issclaim with the Issuer value- An
audclaim with the Audience value- A unique identifier for the app user in the claim named by the ID claim value, so in this case the
subclaim- Must be signed using the HS256 algorithm using a string secret specified in the Shared secret field
You can use JWT.io to check and validate your JWTs if you have any issues.
For example for the settings shown in the screen shot above:
The JWT JSON would look like:
{
  "sub": "[email protected]",
  "nonce": "3d7777d0-ecb1-4154-bee8-8faf66a0d69e",
  "aud": "https://api.compai.com",
  "iss": "https://api.comapi.com/defaultauth",
  "iat": 1700225895945,
  "exp": 1700297896005
}
eyJhbGciOiJIUzI1NiIsInR5cCI6IkpXVCJ9.eyJzdWIiOiJmcmVkLnNtaXRoQGVtYWlsc29tLmlvIiwibm9uY2UiOiIzZDc3NzdkMC1lY2IxLTQxNTQtYmVlOC04ZmFmNjZhMGQ2OWUiLCJhdWQiOiJodHRwczovL2FwaS5jb21wYWkuY29tIiwiaXNzIjoiaHR0cHM6Ly9hcGkuY29tYXBpLmNvbS9kZWZhdWx0YXV0aCIsImlhdCI6MTcwMDIyNTg5NTk0NSwiZXhwIjoxNzAwMjk3ODk2MDA1fQ.ecqIoVsuZy401eyfj7YJuw4Na5cIcn1P3z13Urt7Y5A
-
Now you need to configure you app's push systems. Depending on the operating systems that your app was built for, enter your FCM credentials and/or enter your APNS credentials.
-
Expand the Status drop-down menu and select Enabled.
-
Select SAVE.
A value is populated for you in the API space ID field, which you need to initialise an SDK, so note this down for your development team.
You now have configured your push notifications in Dotdigital
Enter your FCM credentials in Dotdigital
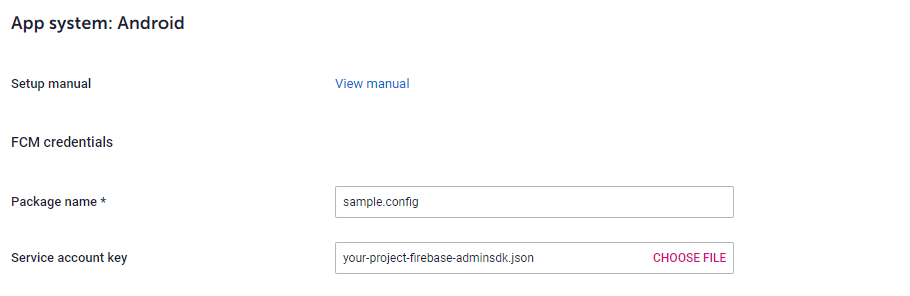
Our Android SDK uses Firebase Cloud Messaging (FCM) to send push notifications to your Android app users. Therefore, you need to give us some details about your Firebase project.
You need to have the Firebase console open. If you don't have a Firebase project, create one.
- In the Firebase console, slect the cog icon and go to Project settings

- In the General tab, copy your package name.
Don't see your package name?
If you don't see your package name in the General tab, you need to select Add Firebase to your Android app.
Complete only steps 1 and 2 (register your app, and download your config file).
- In Dotdigital, paste this into the Package name field.
- Generate a private key and FCM JSON file using these instructions..
- In the Service account key fields select Choose file and upload your FCM JSON file.
- Select SAVE.
Enter your APNS credentials in Dotdigital
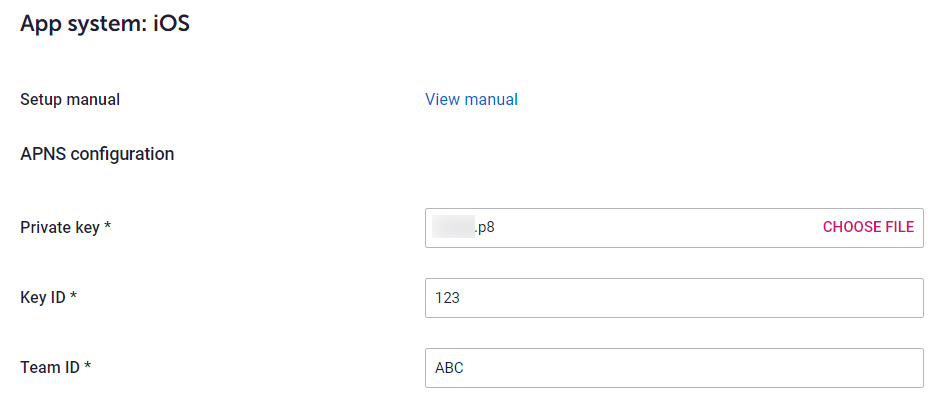
Our iOS SDK uses the Apple Push Notification Service (APNS) to send push notifications to your contacts. Therefore, you need to configure your APNS token details in order for us to send pushes to your app. Dotdigital utilises the APNS tokens rather than APNS Certificates, as the tokens do not expire annually. Instructions for creating an APNS token in the Apple Developer Portal can be found here.
You need to have your Apple Developer Portal open. If you don't have an app ID that has the Push Notifications service enabled, create one.
In your Apple Developer Portal:
- Open the Certificates, IDs & Profiles page.
- Select the Keys > All option and select the + icon to create a new key.
- Enter an appropriate name for the key and ensure the Apple Push Notifications service (APNs) option is selected, and create the key.
- Download the key (.p8 file) and store securely. Note down the Key ID displayed.
In the Dotdigital Push profile setup screen:
- For Private key, select CHOOSE FILE to upload your APNS Key file (.p8).
- For Key ID, enter the value of your APNS key's ID.
- For Team ID, enter the value of your team ID.
- Select SAVE.
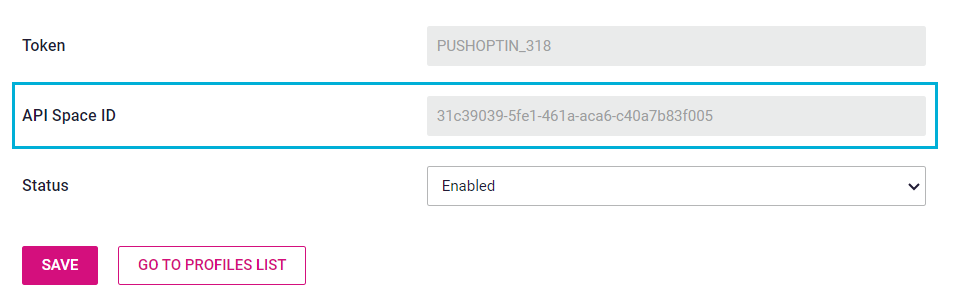
Find your API space ID
The API space ID is used to initialise our mobile SDKs.
This ID is displayed at the bottom of your push notification profile page as shown below:
Updated about 2 months ago